 산테

How to Choose the Right Stand Up Pouch Size
If you are buying stand-up pouches for the first time, you may wonder: What size bag do I need for 250 g of product? Start with three things: what you are packing, how much goes into each bag, and whether the filled bag can close and seal properly. Share this information with your supplier, then test sample bags to find a suitable size.
Step 1 Decide What You Will Pack and How Much
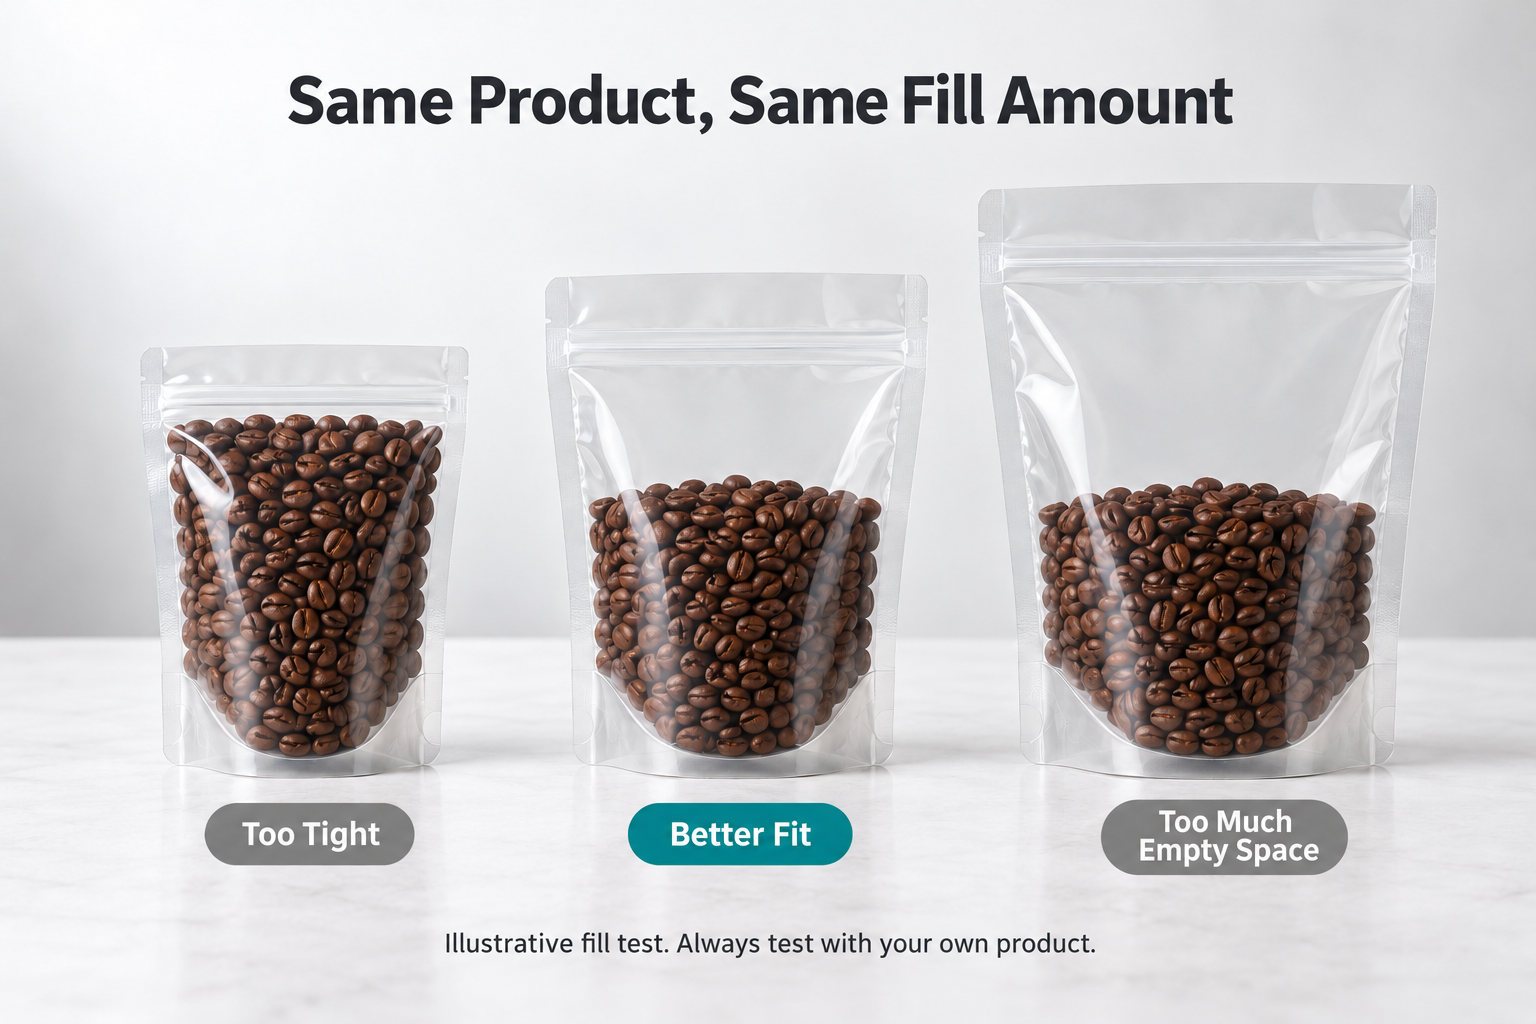
Even at the same weight of 250 g, coffee beans, powder, and puffed snacks can take up different amounts of space. Telling a supplier that you need a “250 g bag” is not enough to determine the size.
Prepare these four details:
- Your product, such as coffee beans, candy, or craft items.
- The amount per bag, such as 250 g, 500 mL, or 10 조각.
- What the product looks like. A photo or a physical sample is helpful.
- Any packaging you already use, including what works well and what you want to change.
If you are unsure about material names or how to measure a pouch, send your supplier the product and your current packaging first. They can suggest sizes to try.
Step 2 Understand the Three Pouch Dimensions
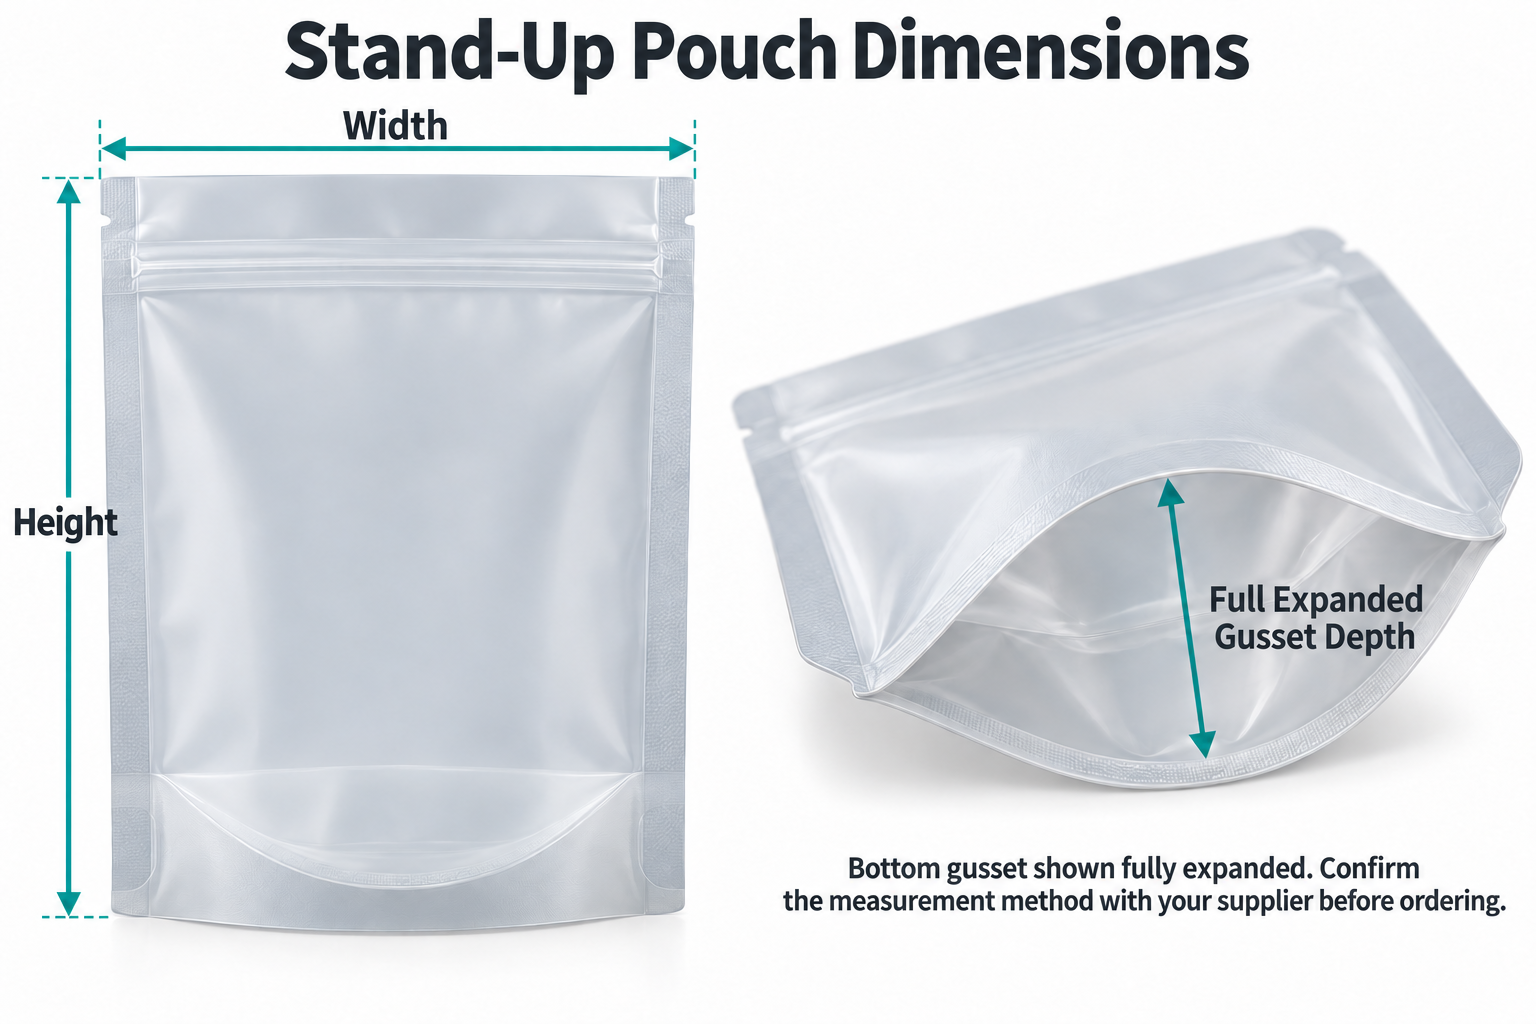
Stand-up pouch specifications often list the width, height, and bottom gusset size. Width is measured from one outer side edge to the other with the empty bag lying flat. Height is measured from the top edge to the bottom edge. The folded section at the bottom that opens out when the pouch is filled is called the bottom gusset.
Always check how the bottom gusset is measured. Some suppliers quote its full expanded depth, while others quote the depth of one folded half. Ask the supplier to mark the measurement on a photo or drawing so you are both referring to the same dimension.
The outside width includes the sealed edges on both sides. Space at the top may also be needed for the zipper and heat seal. A pouch that looks large enough on the outside may therefore have less usable space than you expect.
For craft items with a fixed shape, measure their length, width, and thickness first. Then check whether they fit through the bag opening easily and whether the bag can still close and seal after filling.
Step 3 Test a Few Similar Sizes
Once you know how much product will go into each bag, ask your supplier for two or three sizes close to your needs. Fill them and compare the results.
If you already have a bag, try filling it first. Is it too small, too large, or about right? Take front and side photos of the filled bag, then tell your supplier what you would like to adjust.
If you do not have bags yet, place your target weight of powder or granules into a measuring container to estimate how much space it takes up. This helps your supplier suggest initial sizes, but you still need to test the product in actual bags. For craft items, provide the item dimensions and explain how they will be arranged inside.
Online size charts can help you get started, but check whether they list grams or milliliters. Grams measure weight; milliliters measure volume. A “500 mL pouch” does not mean it can hold 500 g of every product.
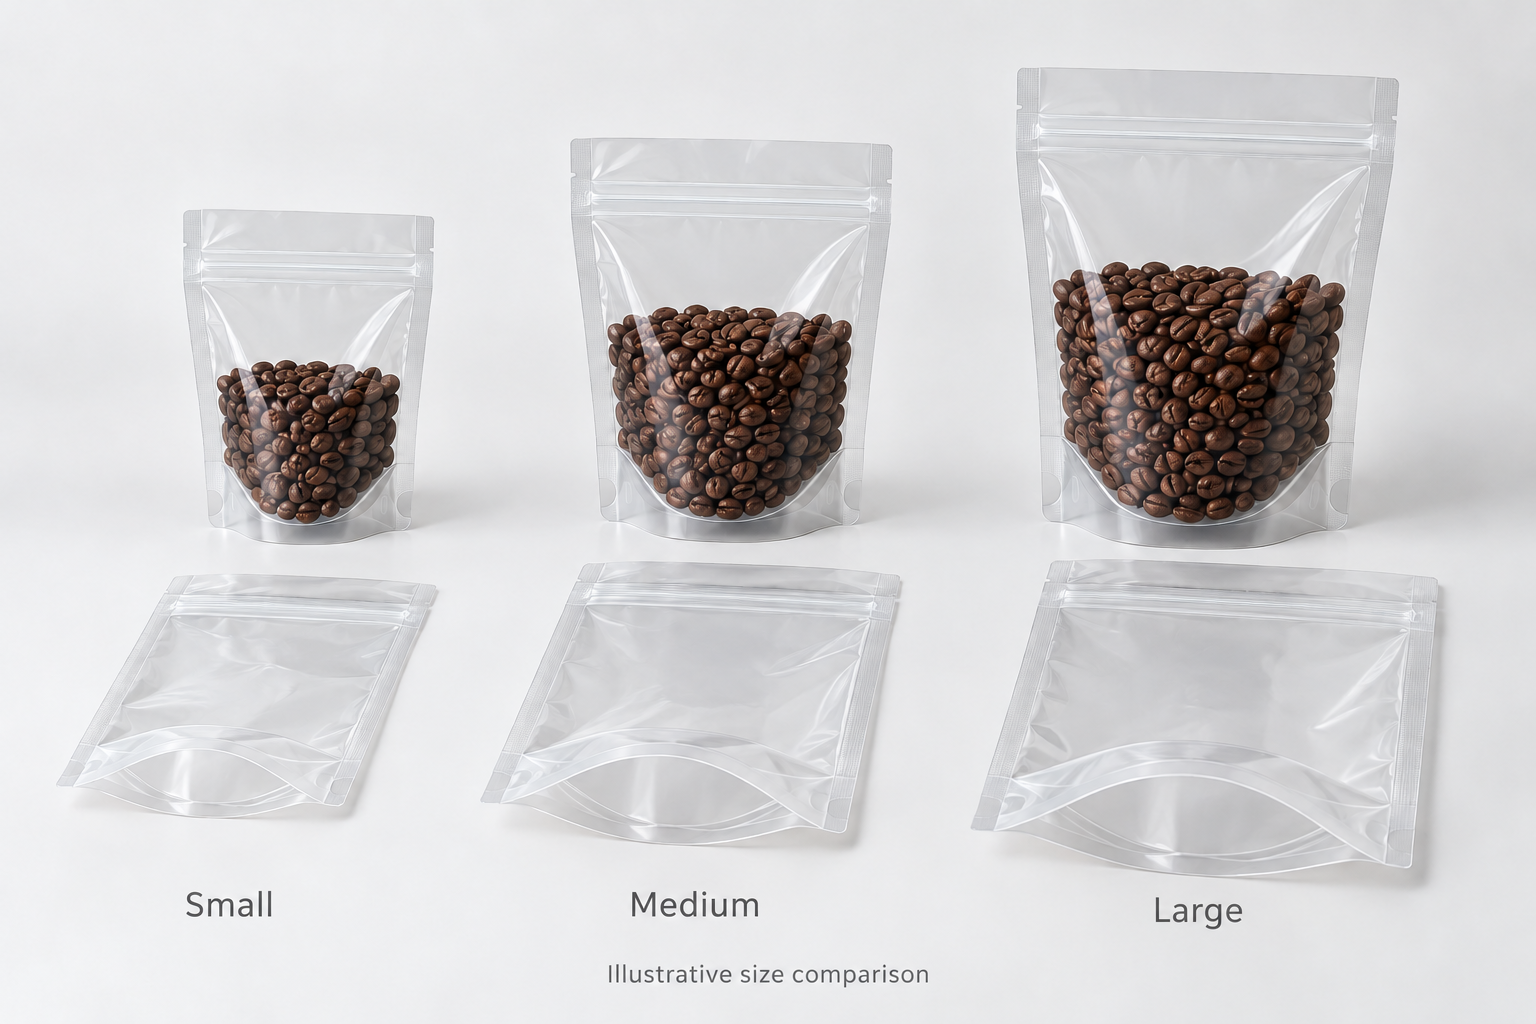
Step 4 Check Five Things After Filling
Fill each sample with the weight or number of items you plan to sell. Use the same product and fill amount across the sizes wherever possible so the comparison is meaningful.
- Is it easy to fill? Can the product go into the bag smoothly, or is the opening too narrow? If you have to force the bag open or squeeze the product in every time, try another size.
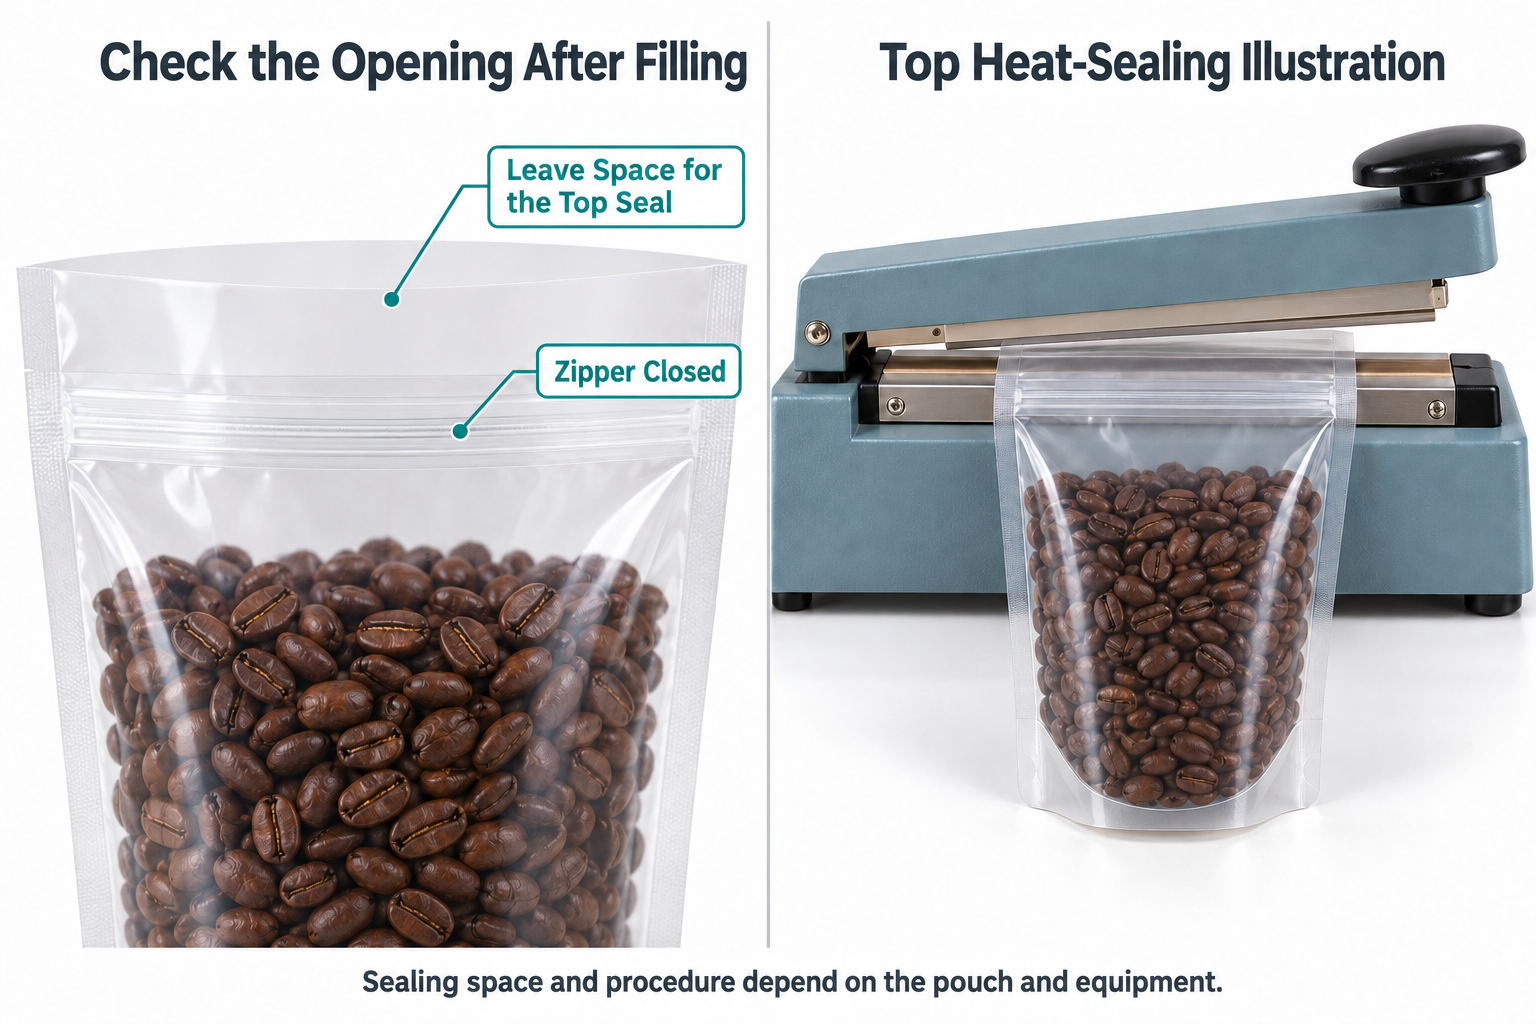
- Is it easy to close and seal? Does the zipper close easily after filling? If the bag needs a heat seal, is there enough clear space at the top for the sealing operation? Check that powder or other product is not trapped in the sealing area.
- Does it stand well? If the pouch will stand on a shelf, check it after filling and sealing. The appearance of an empty bag alone will not tell you how the finished pack will stand.
- Does it look right? Is the bag stretched too tightly, or does it look noticeably underfilled? Does the front display look the way you want? Place the filled samples side by side to compare.
- Does it fit your box or shipping carton? If you use a specific outer box, shelf, or carton, place the filled bags inside to check the fit and arrangement.
If you use filling equipment, also test the sample bags on the actual machine. A bag that can be filled by hand may not open, fill, or seal correctly on your equipment. Share the machine model and its requirements with your pouch supplier in advance.
For testing, use samples that are as close as possible to your planned order in pouch style, material, zipper, and other features. If the sample material differs, ask what the test can reliably confirm. Finding the right size is one part of the process; seal quality and product protection must also meet your actual requirements.
Step 5 Confirm the Sample and Drawing Before Ordering
After choosing a suitable sample, confirm the pouch dimensions, the bottom gusset measurement method, the material, and the positions of features such as the zipper and hang hole. Ask your supplier for a clearly labeled drawing and keep the approved sample.
You can also ask whether the supplier has an existing size close to your needs. If it works in a filling test, compare the price, minimum order quantity, and delivery time. If the opening, overall proportions, or carton fit still need improvement, discuss a custom size. Confirm the actual cost and lead time with your supplier.
Before placing your order, check four things:
- The bags will match the approved dimensions and features.
- The quantity needed for each design is confirmed.
- The print artwork and pouch drawing are approved.
- The agreed delivery schedule and acceptance requirements are clear.
Frequently Asked Questions
Can I ask for a quote if I only know that each bag needs to hold 250 g?
Yes. Also tell the supplier what the product is, and provide a photo or sample if possible. They can suggest sizes to try. Confirm the final choice with sample bags before placing a production order.
Would buying a larger bag make things easier?
You need enough room for filling and sealing, but you should also check the appearance and how the bags fit in your cartons. Comparing a few samples usually makes the choice easier than simply choosing a larger size by guesswork.
Can I order directly from an online size chart?
Use a chart to narrow down your options, but check which product was used to determine the listed capacity. Test your own product in the bag to confirm that filling and sealing work properly.
Can different products use the same pouch size?
You can test this, but check each product separately. Differences in fill amount, shape, and packaging requirements can affect the result.
How much empty space should I leave at the top?
It depends on the zipper, sealing method, and fill amount. Ask your supplier to mark the area that needs to stay clear, then confirm it in a filling test. There is no need to guess a single measurement for every pouch.
Get Ready to Choose Your Pouch Size
If you are choosing stand-up pouches, send us your product photos, fill amount per bag, current packaging dimensions, and filling method. We can recommend suitable sizes based on your needs and provide free samples. Test them with your product to confirm the right packaging solution.